The onboarding wizard
The first time you open Inkome, a short wizard walks you through tailoring your workspace to your actual business — so the app speaks your language from day one instead of showing generic labels. This page walks through each step.
What the wizard does
When you create an organization, Inkome starts you on generic defaults. The wizard replaces those with ones that fit your vertical: it sets your workspace (organization) name, picks a business type for your first space, and generates the right pipeline stages, units, and cost types for it. There’s a three-step progress bar across the top so you always know where you are.
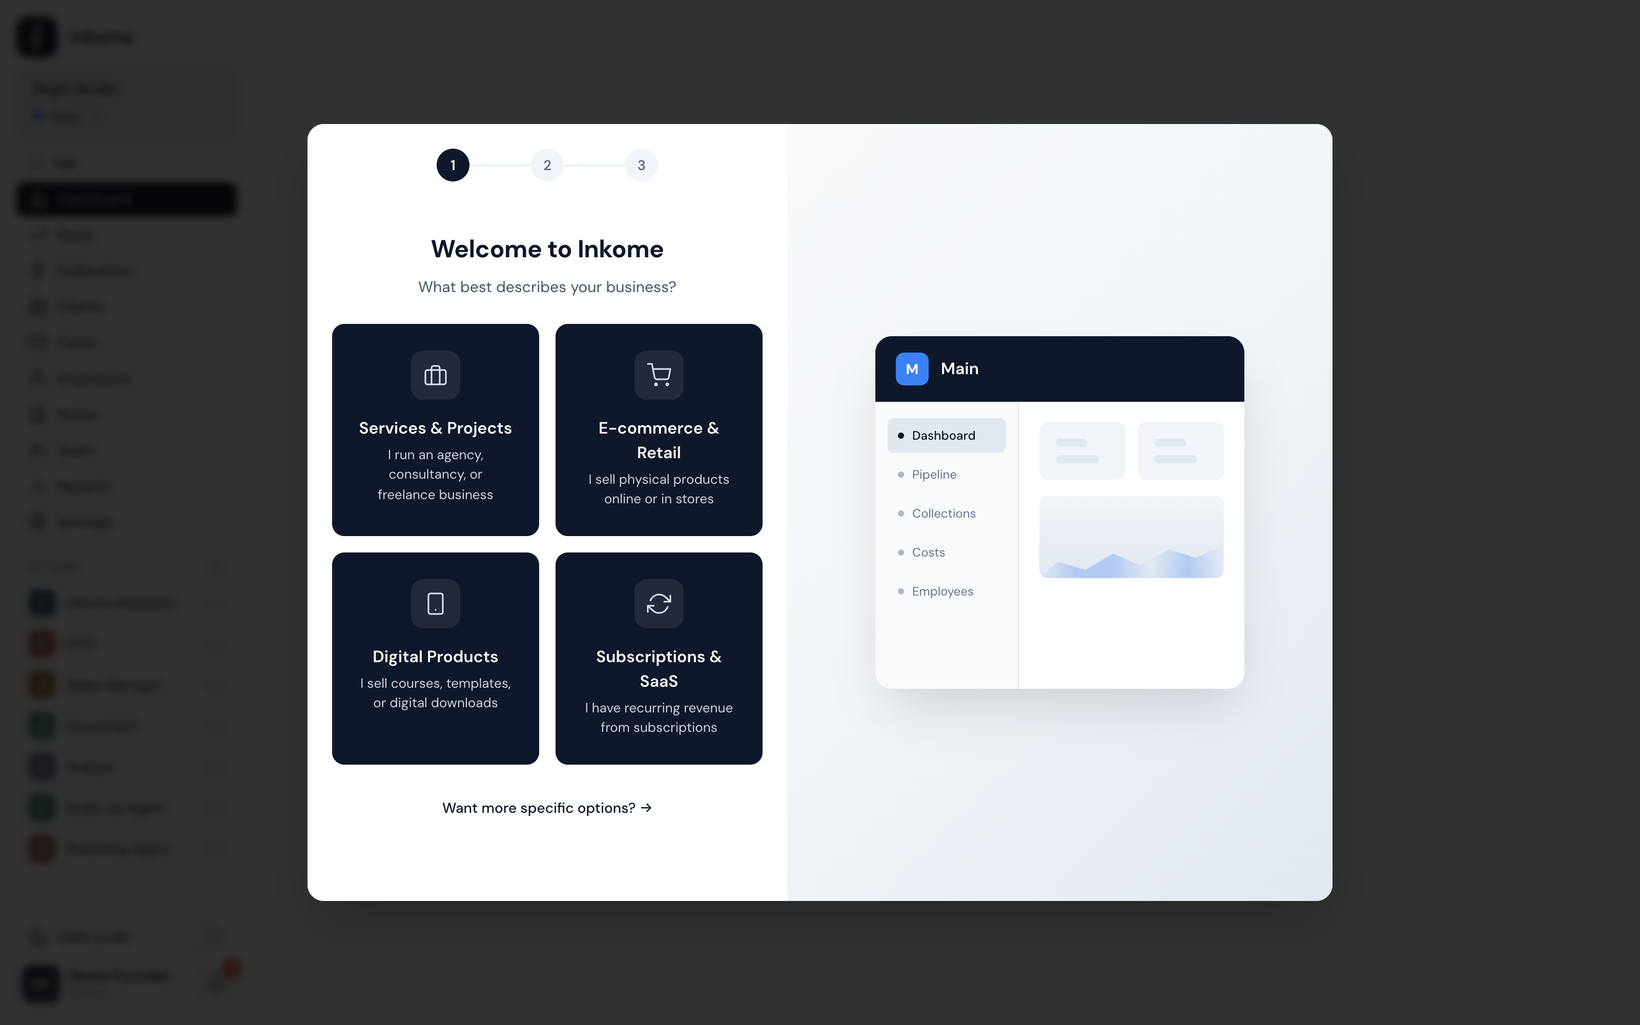
Step 1 — Choose your business type
The first step is headed Welcome to Inkome with the prompt What best describes your business? You pick one of four cards:
| Business type | Card name | Best for |
|---|---|---|
| Services | Services & Projects | Consulting, freelance, agencies, contractors |
| E-commerce | E-commerce & Retail | Physical products sold online or in stores |
| Digital | Digital Products | Apps, templates, courses, downloads |
| SaaS | Subscriptions & SaaS | Recurring revenue, memberships |
Picking a card advances you automatically — there’s no separate Continue button on this step.
Going more specific: industries
If a broad type isn’t precise enough, there’s a link to get more specific — it opens a Choose your industry screen (“Select the best match for your business”). Industries are finer-grained presets that map to a parent business type but come with their own tailored stages, units, and cost types. Available industries include Consulting, Agency, Construction, Professional Services, Real Estate, Freelance, Content Creator, and Manufacturing. A link lets you go back to the simpler business-type choice. Industries and their defaults are covered in detail in Industries & auto-generated defaults.
Step 2 — Customize your workspace
The second step, Set up your workspace, shows that it’s Customized for the type you chose. Here you fill in a few details:
| Field | What it sets |
|---|---|
| Workspace Name | Your organization name (e.g., “Acme Corp, My Company”) |
| Space Name | The name of your first space (e.g., “Main, Products, Services”) |
| Color | A color for the space, chosen from a palette of swatches |
| Default Currency | The space’s currency — TRY, USD, EUR, or GBP |
If you run a single business, there’s a Copy from workspace link that fills the space name with your workspace name. An info note explains it plainly: Workspace is your company. Spaces are revenue streams within it. You can change any of these later in Settings.
Live preview
While you’re on this step, the right side shows a live preview of what your space will contain — the Pipeline Stages, Business Units, and Cost Categories that come with your chosen type. Changing the space name or color updates the preview as you type, so you see exactly what you’re about to create. A note reminds you: You can customize these anytime in Settings.
When you’re happy, choose Continue.
Step 3 — Create
The final step confirms everything is ready — Your workspace is ready! — and shows a short timeline of what to do next. Behind the scenes, Inkome applies your choices: it renames the workspace, sets the space’s business type, color, and currency, and replaces the starter stages, units, and cost types with the set generated for your business type or industry. Choose Get Started to enter the app.
Skipping or changing your mind
The defaults the wizard creates aren’t locked in. Everything — your business type, stages, units, cost types, name, color, and currency — can be edited afterward in Settings. And you can always add another space later with a different business type entirely; see Your first space.
Prev: Create your organization Next: Your first space Up: User guide index