Inviting your team
You grow a team by inviting people in, not by handing out passwords. Inkome sends an email invitation, lets the recipient set up their own account, and drops them into your organization with the role and space access you picked — so nobody starts with more reach than they should.
Who can invite
Only owners and admins can invite people. For members and viewers, the invite button and the invitations tab are hidden. See Members & roles for what each role can do.
Sending an invitation
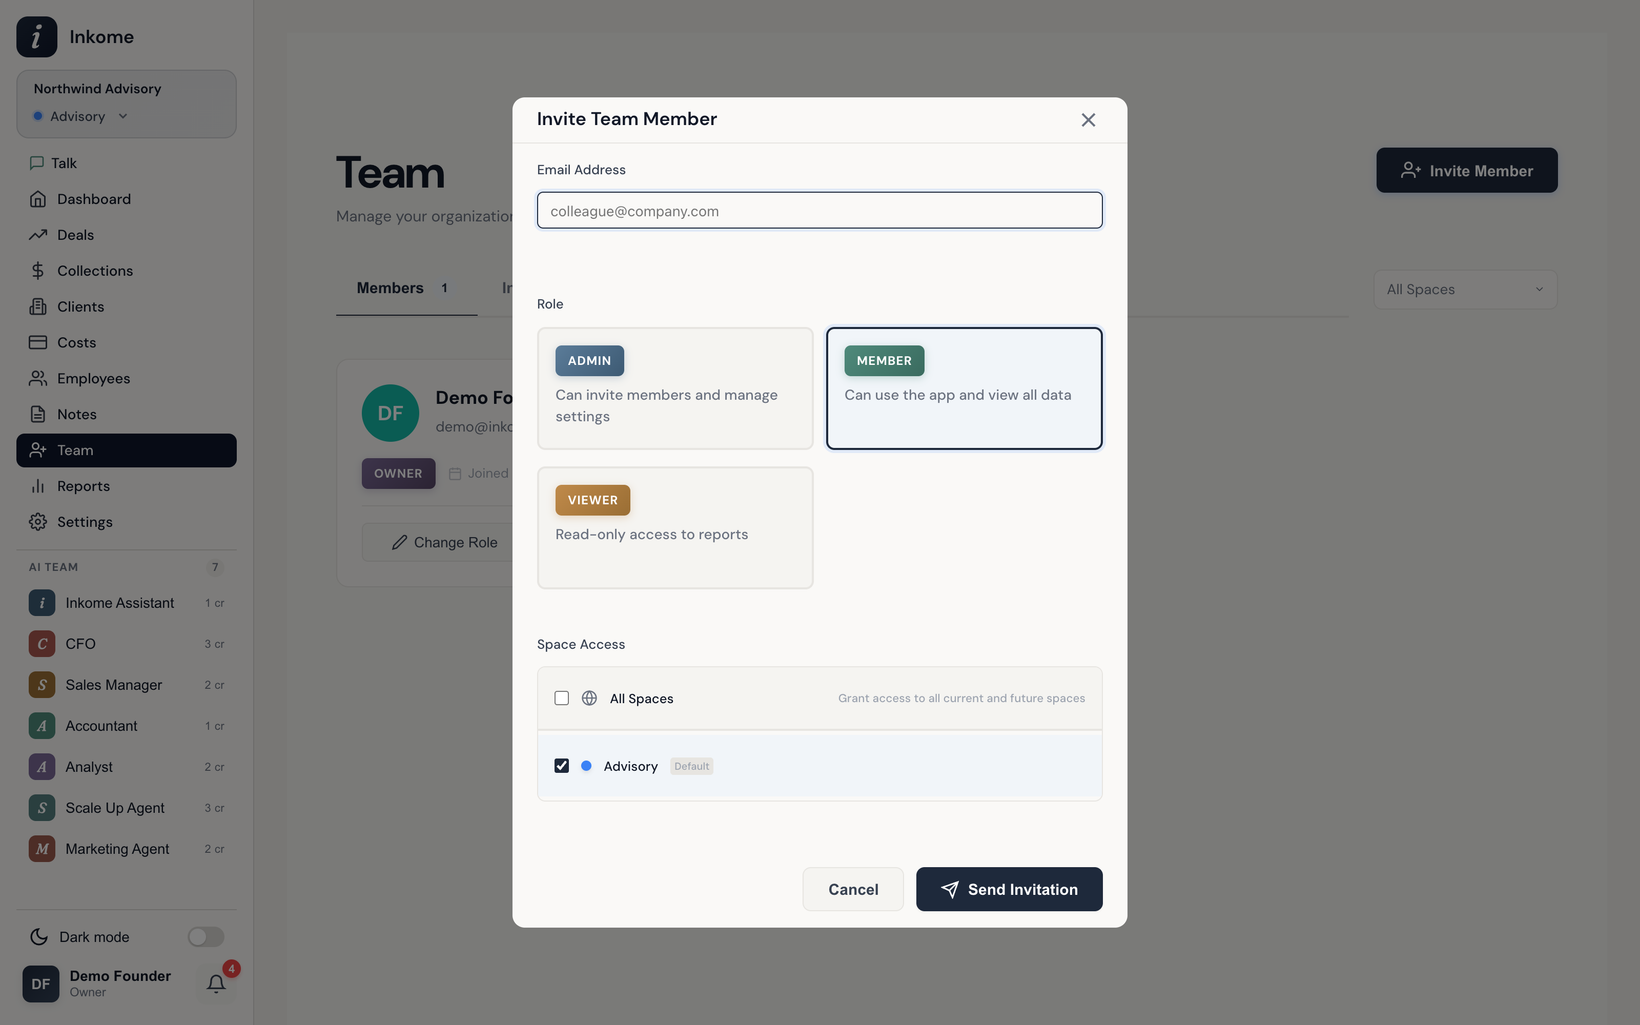
From the team page, choose Invite member and fill in:
- Email — the address the invitation is sent to.
- Role — the role the person gets when they accept. You can invite as Admin, Member, or Viewer. (You can’t invite someone straight in as owner; promote them after they join.)
- Space access — which spaces they’ll see. Pick All Spaces to grant access to every current and future space, or check individual spaces. Admins always get all spaces regardless of this choice; the space selection matters for members and viewers.
Then choose Send Invitation. Inkome emails an invitation link and also creates an in-app notification if the person already has an Inkome account.
A couple of things Inkome checks before sending:
- The person can’t already be a member of this organization.
- There can’t already be a pending invitation for that email.
- Members and viewers must have at least one space selected.
What the invitation link does
The link carries a unique token and expires after a set window. When the recipient opens it, Inkome looks at whether they already have an account:
- New user — they fill in first name, last name, and a password to create their account, then they’re added to your organization. Email verification is skipped because the invitation itself is the proof.
- Existing user — they don’t need a new password; accepting just adds your organization to the ones they already belong to. (See Working across multiple organizations.)
On acceptance, the new member gets exactly the role and space access you set on the invite, and a welcome email goes out.
Managing pending invitations
The invitations tab lists everyone who’s been invited but hasn’t accepted yet. For each pending invite you can:
- Copy Link — grab the invitation URL to send it yourself (handy if the email got lost).
- Revoke — cancel the invitation. Revoking deletes the pending invite so the link stops working.
Once an invitation is accepted it disappears from the pending list (the person now shows up as a member). You can’t revoke an accepted invitation — remove the member instead.
Invitation states
| State | Meaning |
|---|---|
| Pending | Sent, not yet accepted. Shows in the invitations tab with Copy Link and Revoke. |
| Accepted | The person joined and now appears in the members list. |
| Expired | The link sat too long; the invitation is no longer valid. Send a new one. |
| Revoked | You cancelled it before it was accepted. |
Team size limits
How many people you can have depends on your plan. The invite flow checks your limit before opening the modal — if you’ve hit the cap (members plus pending invites), Inkome prompts you to upgrade, or, on the top plan, to get in touch about more seats. See Billing & plans for the numbers.
Prev: Members & roles Next: Working across multiple organizations Up: User guide index